I didn't make this recipe, but my friend Derek from writing group did, and we got to feast on it for dinner today. I found a copy cat recipe for P.F. Chang's Mongolian Beef here and was intrigued, so you can imagine my immense satisfaction that I was able to taste it without having to go buy ingredients or touch raw meat... (definitely not my favorite thing).
The verdict? It wasn't exactly the same as what you get at P.F. Chang's, but it was pretty close and very tasty. I think I prefer my flank steak sliced thinner than they recommend - 1/4 inch seems a bit thick, while the bites I got that were thinner seemed much more tender - but I think that's more personal preference than anything. It's definitely a delicious and fairly straightforward dish and was a nice change from our usual fare of chicken dishes.
Sunday, April 29, 2012
Saturday, April 28, 2012
Baked Mozzarella Sticks - Take 1
Today's food experiment was baked mozzarella sticks, since they're one of Nathan's favorite appetizers and I saw a recipe for them on Pinterest. My recipe is slightly modified from one that I originally found here.
Baked Mozzarella Sticks

Ingredients
- string cheese (as many as you want, up to 12 sticks)
- cooking spray
- 5 Tbs flour
- 1 egg
- 5 Tbs bread crumbs
- 2 Tbs Parmesan cheese
- 1/2 Tbs Italian seasoning
Directions
1. Cut string cheese in half. Freeze the halves until completely frozen.
2. Preheat the oven to 400 F.
3. Measure out the flour in a small bowl/dish.
4. In a second small bowl/dish, beat the egg.
5. In a third small bowl/dish, mix the bread crumbs, Parmesan cheese, and Italian seasoning.
6. Prepare a baking sheet by lining it with foil or parchment paper. If using foil, be sure to spray it with cooking spray to avoid sticking.
7. Once the cheese is frozen, bread it by spraying it with cooking spray, then dipping it into the flour, then the egg, then the bread crumbs.
8. Bake at 400 F for about 4-6 minutes or until crisp. Keep a close eye on them to ensure they don't melt completely.
Serve with marinara sauce (if you prefer). These aren't as good leftover, but it's easy to throw them together in a few minutes, especially if you freeze the cheese ahead of time.
I personally could not get these to bread with a very thick layer of breading. As a result, they were okay but not fantastic. I will make some modifications to the recipe and try again over the next few days... I'll keep you posted on how this experiment turns out!
Friday, April 27, 2012
Something Bite Size to Read
I don't know about you, but I am totally wiped out from this last week. So rather than trying to whip up something in the kitchen (now that it's 11pm) or crank out another book review, I will share something I've been enjoying recently.
I read lots of blogs - some by friends and family members, an a lot by authors I enjoy. Robin McKinley (author of Beauty, Pegasus, and a host of other books) puts up a blog post every single day (in fact, perhaps that's partly why I try to do the same thing). Lately in an effort to drum up new material for blog posts, she began doing a serial fictional story loosely guided by her blog admin, who periodically throws scenarios at her (kind of like D&D but with more freedom for the character). So far she's done five episodes over the last two weeks or so, and I'm enjoying it very much. I've linked all five below for your convenience.
Episode 1
Episode 2
Episode 3
Episode 4
Episode 5
It's very loosely based off of some of her own life experiences - being an author, having dogs, etc. but is not actually autobiographical. I find her writing style to be much more carefree in these little bite size chunks than it is in her more recent novels, which is part of why I like them so much. (I like her novels too. But sometimes they require several re-reads to get everything.)
Anyway. I hope you enjoy it too.
Thursday, April 26, 2012
Chicken and Sweet Potato Stew
Guess what???? I finally cooked something new again! Nathan was very happy to have a real dinner. It even turned out pretty good too. It requires a fair number of ingredients, but I found I really only needed a few extra things outside of my normal purchases. It took me about 45 minutes for me to make start to finish... maybe an hour, I'm not sure. But my chicken was frozen when I started...


Mine looks nothing like the original recipe's picture. Oh well.
Chicken and Sweet Potato Stew
Ingredients
- 4 boneless skinless chicken breasts, cut into 1-inch
cubes (3 if they are really large)
- 1 teaspoon minced fresh gingerroot (I used 1/4 tsp ground ginger)
- 2 garlic cloves, minced (I used 1/2 tsp garlic powder)
- 1 teaspoon olive oil
- 1 cup chopped onion (1/2 a large onion)
- 1 cup chopped sweet red pepper (I actually omitted this because I don't like peppers.)
- 1 teaspoon ground coriander
- 1 teaspoon ground cumin
- 1 teaspoon curry powder
- Dash ground cinnamon
- 3 cups cubed peeled sweet potatoes* (I used two - though it probably wasn't 3 full cups)
- 1 1/2 cups chicken broth
- 1 1/2 cups water
- 1/4 cup orange juice
- 1 cup uncooked couscous
- 2 tablespoons cornstarch
- 3/4 cup light coconut milk
- 2 tablespoons minced fresh cilantro
Directions
1. Thaw the chicken ahead of time. Or thaw it in the microwave while you chop stuff.
2. Chop the onion, pepper, sweet potatoes, and chicken.
3. In a large skillet, saute the chicken, ginger and garlic in
oil until chicken juices run clear.
4. Add the onion, pepper and seasonings; saute
4-5 minutes longer.
5. Add sweet potatoes and broth. Bring to a boil. Reduce heat;
cover and simmer for 10-12 minutes or until tender.
6. Meanwhile, in a small saucepan, bring water and orange juice to a boil. (If you don't have orange juice, use 2 c water and 2 Tbs orange juice concentrate.)
7. Stir in couscous. Cover and remove from the heat; let
stand for 5-10 minutes or until water is absorbed. Fluff with a fork.
8. Combine cornstarch and coconut milk until smooth. Stir into
chicken mixture. Bring to a boil; cook and stir for 2 minutes or until
thickened.
9. Stir in minced cilantro.
10. Serve with couscous. Yield: 4-5 servings.
*Did you know not all sweet potatoes are orange? I was very surprised to find mine were white. And also slightly disappointed because they weren't as pretty in the dish. They still tasted good though.
Recipe slightly modified from here. I doubled it because if I'm going to go to all the work of making dinner, I want it to make more than two servings. Plus it meant we could feed Amy one last time before she moves far, far away.
And now for some pictures:

After step 4.

All done! It would be a lot more colorful if a) I had purchased orange sweet potatoes, and b) I didn't leave out the red pepper.

My first attempt at couscous. My mind kept trying to think it was rice. It's not.
Wednesday, April 25, 2012
Book Review: Illusions
Why, yes, I did go to the library last week. And got a huge stack of books. And have been burning through them like crazy. This time it's Aprilynne Pike's Illusions, the third book in her series (the first two being Wings and Spells).

To get you up to speed on the series as a whole, it's about a girl who discovers she is a *SPOILER BUT THERE'S NO AVOIDING IT* fairy when she "blooms" for the first time (grows a giant flower on her back), and then proceeds to discover that she is crucial for the entire fairy world's survival, which is at risk to be invaded by the bad guys (aka trolls). In this latest installment, though, the trolls take a backseat to the love triangle that we saw developing throughout the first two books. I admit I was a little frustrated with the high percentage of screen time that was focused on the further development of this love triangle, but then, that's not why I'm reading the books. If you like a good love triangle, this is the book for you. I mean, series for you. (I'd like to note that I understand why the love triangle takes center stage, and there is a reason and that does make it more acceptable, but that doesn't mean it's my favorite.)
I will say that Pike does a much better job than most at making her characters believable and (for the most part) sympathetic as well, which I find impressive even though I didn't care as much for the drama. The characters in combination with the mystery set up by the plot is what really kept me reading. I really enjoyed learning more about the world too - despite the fact that my summary makes it sound cliche and boring, in reality Pike does an excellent job at making her world unique and fresh while still drawing from common fairy mythology.
Overall, it was a fun fast read, but I really hope the next one (which happens to come out in about a week) focuses more on advancing the overall plot, resolving that massive cliffhanger ending plot twist, and digging more into the world, and less on jealous boys. (I'm fine with a little jealousy. I just don't want it to be the main focus of the book.)
Being Smart
I went to book group tonight with my sister in law, as per our monthly tradition (minus last month, when she was recovering from childbirth and I was not feeling like going anywhere alone, plus my mom was in town helping out). Book group usually goes about 4 hours (or more, though Nathan gets impatient with me if I'm not home by midnight, and I regret it at work the next day too) and we talk about the book for maybe 15 minutes of that time. The rest of the time we just talk about lots of things, often about raising children (or chickens) but most any subject is fair game.
Tonight was no exception. There was one bit of conversation in particular that resonated especially. We discussed raising smart children, and the impact that society and the family has on that child by how they react to them being smart. Specifically: if a child figures out something new and impressive for their age, do we praise them for being so smart? Do we draw attention to that? Or do we praise them for working hard on their own to figure it out? It's a subtle difference, but an important one. Most of the mothers in our book group have dealt with this before, and the general consensus seemed to be that praising them solely for being smart made it more likely that they would link being able to figure out things on their own with being smart, which often translated to thinking they were stupid when they encountered something that was hard or that they needed help with. In contrast, praising them for working hard helps them understand the value of perseverance, hard work, etc. (in theory, anyway; it's much harder to put that method into practice from what I've seen).
I think parents play an important role in shaping their child's attitude in this regard, but society as a whole will have a significant influence too, and we can't easily control that. How many times have you praised a child for being smart? I do it all the time - even having recognized that I do! And society as a whole tends to do so as well, placing more emphasis and value on being inherently "smart" than on developing crucial skills like perseverance, hard work, and maintaining a positive attitude. As my sister in law so aptly put it, "I would rather have children who know how to work hard than children who are smart. People who can work hard will succeed in life regardless, but people who are smart and won't work hard will not. If you are both, then great, but working hard is more important." (That's the general gist of it anyway.)
It's a careful balance. As a parent, you want to be able to recognize your children for their talents, and don't want to keep people from complimenting them, but you also want them to succeed - and if they give up the moment things get hard, they won't.
I'm not a parent yet. I don't have any real answers. But I'm going to try to be a better influence in the lives of all the children I interact with nonetheless. Will I still praise them for being smart? Probably. I'm not perfect, and it's a tough habit to break. But I hope that I can also help them recognize the role that effort and hard work plays in their success as well, and recognize that their strengths will not be the same as the strengths their siblings or friends have.
That's my take on it anyway.
Monday, April 23, 2012
Book Review: River Marked
River Marked
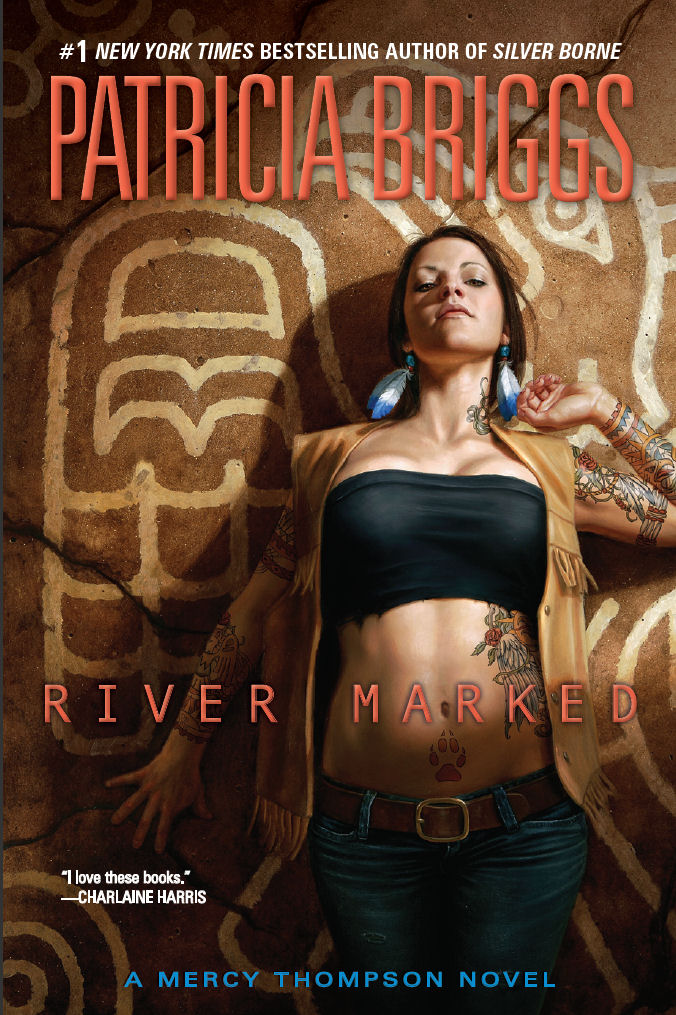
I am also not a huge fan of the cover. But maybe that's just me. It is a completely inaccurate portrayal of the main character.
River Marked picks up soon after where Silver Borne left off. It starts off with a wedding and is one of the most tasteful honeymoon-centered books I've yet encountered. Of course, that may have to do with the fact that people start dying a few days into said honeymoon, and Mercy (coyote shape shifter) and her new husband Adam (alpha male of the local werewolf pack) get suckered into killing a giant monster to stop any more people from dying. But still. I was very impressed with how tastefully the whole thing was handled nonetheless.
I am also impressed with how well Briggs manages to make Mercy's troubles believable, despite the action being completely over the top. (Seriously, I think there are at least 3 or 4 times when she or Adam are seriously injured or beaten up throughout the book.) Mercy seems to attract trouble wherever she goes, and this book is no exception. Briggs deliberately hangs a lantern on it several times (my favorite being the episode in Walmart) which only makes it work even better.
There were a few niggly things that I wasn't entirely content with, of course - the fate of the walking stick, for example, and the fact that the majority of this book was far removed from most of the staples of the Mercy books (what with being set in a completely new location and all), but as a whole I was quite satisfied with this installment. I do think that they are best enjoyed when read in quick succession though. I wish I'd had the chance to read this one a year ago when it first came out.
Overall a fun and quick read. I love the characters and think Briggs has done an excellent job mingling lots of bits of common mythology into a unique and rich world.
Sunday, April 22, 2012
Rice Pudding
I made a discovery about a year ago: I really, really like rice pudding. And then I discovered that it's even easier to make than custard, which I also love, but I'm usually too lazy to make. Plus rice pudding seems to fill the same void that custard does (probably because both have lots of milk and eggs).
And so I present to you my favorite recipe for rice pudding, from the ever useful allrecipes.com. My slightly modified version is below.
Rice Pudding
Ingredients:
And so I present to you my favorite recipe for rice pudding, from the ever useful allrecipes.com. My slightly modified version is below.
Rice Pudding
Ingredients:
- 3/4 cup uncooked white rice
- 2 cups milk, divided
- 1/3 cup white sugar
- 1/4 teaspoon salt
- 1/2 teaspoon pumpkin pie spice (or cinnamon)
- 1 egg, beaten
- 1 tablespoon butter
- 1/2 teaspoon vanilla extract
Directions:
1. Bring 1 1/2 cups water to a boil in a saucepan; stir rice into
boiling water. Reduce heat to low, cover, and simmer for 20 minutes. Or just use a rice cooker to make 3/4 c dry rice into 1 1/2 c cooked rice.
2. In a clean saucepan, combine 1 1/2 cups cooked rice, 1 1/2
cups milk, sugar, salt, and pumpkin pie spice. Cook over medium heat until thick and creamy, 15 to
20 minutes.
3. While that is cooking and you are stirring it fairly often, thoroughly mix the remaining 1/2 c milk with the beaten egg. This helps prevent the egg from cooking into lumps when you mix it in.
4. Stir in remaining 1/2 cup milk and beaten egg mixture*; cook 2
minutes more, stirring constantly. Remove from heat and stir in butter and
vanilla.
* If you mix some of the hot rice goop into the egg/milk mixture, it also helps prevent egg clumps. However, this takes more effort than I am willing to put forth usually. Slowly mixing the egg/milk mixture straight into the hot rice goop will result in a few little clumps, but nothing too noticeable. You decide how much effort it's worth to you...
I usually double this recipe (and I could eat it all myself, though I end up sharing most of the time). It's tasty hot or cold, though I like it best hot. You can add raisins if you want (yuck) but I prefer it with just the cinnamon/pumpkin pie spice. I have had many people tell me they really like it even though they don't normally care for rice pudding, so I swear it's not just me obsessing over it. :)
Saturday, April 21, 2012
Bits and Pieces
I made several important discoveries today. (Or rediscoveries, in some cases.)
1. Dance Central 2 is much more tiring when you play fitness setlists - hardly any downtime in between songs makes a big difference. (On the plus side, it makes an hour's worth of exercising really only take about an hour, instead of an hour and a half.)
2. I vastly prefer helping in the kitchen to helping in the yard. I'm pretty useless outside, but I can chop onions like a boss.
3. Having my in-laws come over gives me all the incentive I need to clean up our apartment. And it's pretty nice having most of it done Friday so that it's not looming over my head all day Saturday.
In other news, Nathan trimmed his beard today. *gasp*
Before (taken by George Major during our steampunk extravaganza):

and after (obviously far inferior quality picture, because I took it, not my brother in law):

It is, as you can see, much shorter. But it still looks awesome. Upon subjecting my 2 year old nephew to a quiz, he correctly identified that Nathan's beard was cut, not his hair.
1. Dance Central 2 is much more tiring when you play fitness setlists - hardly any downtime in between songs makes a big difference. (On the plus side, it makes an hour's worth of exercising really only take about an hour, instead of an hour and a half.)
2. I vastly prefer helping in the kitchen to helping in the yard. I'm pretty useless outside, but I can chop onions like a boss.
3. Having my in-laws come over gives me all the incentive I need to clean up our apartment. And it's pretty nice having most of it done Friday so that it's not looming over my head all day Saturday.
In other news, Nathan trimmed his beard today. *gasp*
Before (taken by George Major during our steampunk extravaganza):
and after (obviously far inferior quality picture, because I took it, not my brother in law):

Friday, April 20, 2012
How To Make a Corset Belt

Pictured: one steampunk corset belt. Photo by George Major.
I had some leftover pleather from the remnant bin at Joann Fabrics after our goggles extravaganza, so I decided I wanted to make a corset belt (a la EPBOT again). Unfortunately, I found no patterns anywhere. But never fear! My sister in law is amazing and can whip patterns out of thin air!
Materials needed:
- Fabric of your choice (preferably something heavy/thick, like pleather, vinyl, etc.)
- cording of your choice (I used suede cord, but if I could have found something less stiff I would have preferred that instead)
- Eyelet kit (found with the snaps, velcro, etc. in the craft store)
- Hammer
- Scissors
- Thread
- A helper
- Duct tape
- An old shirt or saran wrap or something of that sort (I used a very thin sheet of foam padding stuff)
First, get your helper. Wrap yourself (with their help) with the saran wrap or stuff of that nature, or just put on an old shirt you don't mind cutting up. Then wrap duct tape around your waist until it covers about the area you want the corset belt to cover. Carefully cut it off of you once you are satisfied. (Your helper will probably be doing most of this, actually.)
Now you have a basic pattern. Add bits and pieces as you deem fit to make it look approximately the shape you want. I made it so that mine went up a bit to follow the bust line and down a bit over my waist, but you can't really tell in the picture.
Decide if you want your corset belt to lace up the front, or the front AND back. I decided to do front and back so that it didn't bunch up as much. (Also because it was easier to fit the pattern onto the cloth I had.) My tutorial will reflect that decision.
Cut your pattern in half (the short way) so that you have two pieces that each fit around half of your waist. Trace them onto your fabric. If you are hemming the tops and bottoms (long ends) of your fabric, be sure to adjust for a seam allowance. You do not need to adjust for a seam allowance on the short ends because you need some extra room to lace it up anyway.
Cut out your fabric. If hemming the long ends, do so now. If not (I didn't - pleather doesn't fray really), continue on to the next step.
Pin and hem your short ends. I did 3/4 of an inch for this part, allowing plenty of room for my eyelets (but not tons extra).
Put in the eyelets. We did this by poking a hole in the fabric with a nail/Exacto knife and then widening it bit by bit with scissors, though you may have a more appropriate tool selection to aid you in this endeavor. If you got the eyelet kit, it will come with the tools you need to secure the eyelets in the holes you just made; I simply followed the instructions on the back of my kit. It was pretty straightforward. You do need to be careful not to cut the holes too big or your eyelets will pop out easily.
Finally, lace up your corset in the front and back, an enjoy!
Note: if you are more curvy, or want it to fit more specifically to your shape, you can add more panels than just two, but I was running short on time so I skipped out on that. I'm no expert on how that would work exactly, but I know it involves making the corset belt go in more in the middle and out more at the top and bottom.
Again, I want to give a big THANK YOU to my sister in law for figuring this all out for me. She is a pattern genius! She does the hard part, and I just do the sewing. :)
Thursday, April 19, 2012
A little preview.


Photos courtesy of George Major. WHO IS AWESOME.
More to come soon. And maybe I finally will update my profile photo...
Teaser
We just spend most of the evening finishing up some stuff for our steampunk outfits, and now I want to go to bed, so I will be brief. We're doing a photo shoot tomorrow with Amy (Nathan's brother is doing the pictures because he actually knows about photography!) so expect some awesome pictures coming up soon!
Tuesday, April 17, 2012
Shopping Expedition
I went shopping with Amy today. We're determined to do a steampunk photo shoot before she moves, and of course I was severely lacking in the outfit department. So we hit up Plato's Closet, Kohl's, and the mall with varying success. (No pictures yet. I don't want to spoil the photo shoot.) I found two skirts at Plato's closet - which, obviously I would only wear one, but the other one was brand new (tags still on) and only $6. It's white. I probably wouldn't pay more than that for a white skirt. I'm terrified I will instantly get it dirty. Not this particular skirt; just in general with white pants/skirts.
ANYWAY. Kohl's was quite disappointing (they are pretty hit or miss) but we found some fun stuff in the mall, including an awesome pocket watch on a necklace that I totally bought with my Christmas money that I'm hoarding. Except I don't think the watch part actually works, but I have to investigate more fully to be certain. But still. It looks cool. Also Amy gave me some boots (the ones she let me borrow for the steampunk party a while back). SHOES! Excellent! I will miss her so much when she moves away.
Also also we found some cool headbands at Icing but they were nearly all like $20 which is completely ridiculous. Maybe I'll make myself one for super cheap. Dang. I should have taken a picture of my favorite as inspiration.
That's pretty much all I got. But my outfit is coming together very nicely. And now I'm exhausted and should go to bed. Sorry this was a bit disjointed.
Monday, April 16, 2012
Nine!
Nathan finished book #9! And in case you didn't click that link, he wrote it in two weeks. Yep. I'm very impressed. I issued the challenge (more as a way of helping him get back in his groove than anything) and he took it, and was determined to do it - even though we've been super busy the last two weeks. The final push involved 8-10k words per day the last three days. I was extremely impressed. And I'm also super excited, because now for the first time ever I get to read a whole Nathan book in one go! (Usually I read along as he writes it, catching up every 2-3 days or so.)
In other news, I went to the library Saturday and now I'm burning through the huge stack of books I got. So far I read A Tale of Two Castles by Gail Carson Levine (meh, not as good as her other stuff), and Tuesdays at the Castle by Jessica Day George (very entertaining and fun). I must have a thing for castles I guess. I just started Across the Great Barrier by Patricia Wrede, breaking the pattern. Yes, I know these books have been out a while; I'm just trying to get caught up on my backlog. And what a backlog it is... BUT I would like to report I have read 26 books so far this year, putting me at 26% of my goal. I'm a little behind (Goodreads is very diligent at telling me exactly how far behind) but hopefully with this haul I will be back on track.
Sunday, April 15, 2012
My Crafty Endeavors
I spend a good chunk of time this afternoon cultivating my crafty side some more. See, my sister-in-law holds a boutique/bake sale every year to raise money for Autism Speaks because my niece and nephew have autism. I live in another state so I can't help out a whole lot, but I can donate crafts at least. :) I'm running a bit behind this year - the boutique is this Thursday - but hopefully my meager contributions will get there in time.
I made five pairs of earrings and four plushie monsters (though to be fair, the crocheting was done already from my Christmas rush; I just had to do the faces and stuff them - so not quite so impressive as you may think).


I made five pairs of earrings and four plushie monsters (though to be fair, the crocheting was done already from my Christmas rush; I just had to do the faces and stuff them - so not quite so impressive as you may think).

I am kind of terrible at photographing earrings. But we have blue and purple/green on the left, and turquoise, brown, and purple/yellow on the right.

Yay! More monsters!
Saturday, April 14, 2012
Game Review: Dragon Quest V: Hand of the Heavenly Bride
As you have gathered from previous blog posts, I finally finished Dragon Quest V: Hand of the Heavenly Bride a few days ago. (I actually still have the optional extra dungeon to beat, but I saved the world and all that.) And now you get a review! As a bit of background, DQV is the middle of a trilogy spanning DQ IV, V, and VI, but the three stories are unconnected. They just have certain story elements in common, like the Zenithian armor and dragon.

Look at that hideous box art. Do not be put off by it.
DQV takes place over 30 years and three generations (sort of). When the game begins, you are the young Hero (bec, in this case, of course) tagging along with your dad as he takes care of some business (generation 1). As the plot progresses, Hero grows up and is on his own (due to events that I will not spoil). That's generation 2 (even though you are the same person). Then Hero gets married (spoiler, but you can pick one of three choices for your bride, which is cool) and of course Hero's wife gives birth shortly thereafter (leading into generation 3). However, you control Hero as your primary character throughout.
Plot wise, it is about on par with the rest of the series. You have to save the world from a big baddie in the underworld. The plot does make the fight a bit more personal though compared to others in the series, since you spend a good chunk of the game rescuing family members that have been kidnapped by said big baddie's minions. The added focus on Hero's family resulted in a much stronger character line-up overall. (I actually felt kind of bad leaving Wife out of the party for the final boss fight, but she was severely under-leveled due to spending most of gen 3 kidnapped (sort of).)

Throughout the game, you have the option to recruit monsters to fight for you. This is helpful in the beginning (when you only have 2 people, maybe 3 in your party) though I stopped using monsters for the most part by generation 3. Still, it adds a great deal of flexibility to the game play, which is nice, and it gives completionists something to obsess over (have I recruited every single possible monster even though I can only ever have 3 in my party at any given time and I have to level each one up from scratch in order for them to be at all useful?). They also allow you to have extra access to spells, which is quite useful. I usually kept one or two with healing spells in my wagon (which holds the backup party members) so that I could use them to heal up after battles instead of wasting my primary healer's mana.

Battles are exactly like they are in every DQ game (and very similar to most turn based JRPGs), but the system works, so why mess with it? One interesting mechanic they added with the monsters is that you cannot control them until their "wisdom" stat is high enough that they can follow orders. That means you normally keep freshly recruited monsters in the wagon while you level grind until they become useful. That way they earn XP without taking up a valuable spot in your fighting lineup. There aren't quite as many places to fight metal slimes in this one, which is a shame, but there's still at least one place on the world map where they appear occasionally if you need to do some level grinding.

I really enjoyed the addition of TNT boards, which are essentially mini board games. You have a set number of dice rolls, and you move around the board trying to reach the finish to access 2-3 chests with sweet items/armor/weapons. Each square represents something, either a monster battle, lose/gain dice rolls, lose/gain money, warp, random stat boost/degradation, treasure chest, etc. Only Hero gets to go on the TNT board, but the enemies in the monster battles are generally pretty easy. You pick up tickets to play TNT boards all over throughout the game. There are 5 boards and at least 30 tickets scattered around, and you get a TNT free pass near the end of the game that I assume gives you unlimited plays. It's a nice change of pace, even though the luck element can get a little frustrating at times.
All in all, DQV is a solid addition to the Dragon Quest series. I sunk about 30 hours into it so far, which considering we got it for about $15, is a pretty good value time-wise. (It is currently around $17 on Amazon.) If you liked others in the series, you should probably pick this one up too.
Plot wise, it is about on par with the rest of the series. You have to save the world from a big baddie in the underworld. The plot does make the fight a bit more personal though compared to others in the series, since you spend a good chunk of the game rescuing family members that have been kidnapped by said big baddie's minions. The added focus on Hero's family resulted in a much stronger character line-up overall. (I actually felt kind of bad leaving Wife out of the party for the final boss fight, but she was severely under-leveled due to spending most of gen 3 kidnapped (sort of).)
Hero always wears that strange purple turban. This is a shot of the menu screen, where you can equip items, cast non-battle spells, rearrange your party, trigger non-essential dialogue, etc.
Throughout the game, you have the option to recruit monsters to fight for you. This is helpful in the beginning (when you only have 2 people, maybe 3 in your party) though I stopped using monsters for the most part by generation 3. Still, it adds a great deal of flexibility to the game play, which is nice, and it gives completionists something to obsess over (have I recruited every single possible monster even though I can only ever have 3 in my party at any given time and I have to level each one up from scratch in order for them to be at all useful?). They also allow you to have extra access to spells, which is quite useful. I usually kept one or two with healing spells in my wagon (which holds the backup party members) so that I could use them to heal up after battles instead of wasting my primary healer's mana.
Battle screen. Behold the monsters in the party.
Battles are exactly like they are in every DQ game (and very similar to most turn based JRPGs), but the system works, so why mess with it? One interesting mechanic they added with the monsters is that you cannot control them until their "wisdom" stat is high enough that they can follow orders. That means you normally keep freshly recruited monsters in the wagon while you level grind until they become useful. That way they earn XP without taking up a valuable spot in your fighting lineup. There aren't quite as many places to fight metal slimes in this one, which is a shame, but there's still at least one place on the world map where they appear occasionally if you need to do some level grinding.
TNT Board!
I really enjoyed the addition of TNT boards, which are essentially mini board games. You have a set number of dice rolls, and you move around the board trying to reach the finish to access 2-3 chests with sweet items/armor/weapons. Each square represents something, either a monster battle, lose/gain dice rolls, lose/gain money, warp, random stat boost/degradation, treasure chest, etc. Only Hero gets to go on the TNT board, but the enemies in the monster battles are generally pretty easy. You pick up tickets to play TNT boards all over throughout the game. There are 5 boards and at least 30 tickets scattered around, and you get a TNT free pass near the end of the game that I assume gives you unlimited plays. It's a nice change of pace, even though the luck element can get a little frustrating at times.
All in all, DQV is a solid addition to the Dragon Quest series. I sunk about 30 hours into it so far, which considering we got it for about $15, is a pretty good value time-wise. (It is currently around $17 on Amazon.) If you liked others in the series, you should probably pick this one up too.
Friday, April 13, 2012
Pictures from Wing Night
Proof of our adventurous spirit. Warning: this is a picture heavy post because I don't feel like writing a Dragon Quest V review tonight. But one is coming soon! And I finished our state tax return tonight and it was surprisingly easy! Also if you ever get the chance to go out to eat with Nathan (and me), you should totally do it because he is hilarious. Especially that one time when we went to Outback Steakhouse and he asked for everything "on the barbie".

Nathan holding the menu

Man, those soft pretzels were really tasty. We got Parmesan Garlic sauce and cheese sauce to dip them in.

Slowly decimating the boneless wings. With lots of water to wash them down.

Nathan trying the Caribbean Jerk - which he was afraid would be super spicy and then was surprisingly delicious with a very manageable kick.

Our writing group friends :)

Here I go, trying Caribbean Jerk.

Here we are dominating the trivia game in between stuffing our faces.
Thursday, April 12, 2012
Wings
We went out again tonight. (I know. This is a new record. We will probably subconsciously compensate by not going out at all for a month just to make up for it.) This time we met some friends in Lehi for some Buffalo Wild Wings, which we heard was the bomb-diggity.
Well, it was pretty tasty. If you get the chance to go, you should probably take it. Thursdays they have 60 cent boneless wings (normally they are nearly a dollar each), so we got five baskets (each with 4 wings) with five different flavors of sauce and went to town. Of course, I only ended up eating about 6, so we brought a lot home, but they were extremely tasty (so long as I didn't dwell too much on the fact that I was eating mostly meat for dinner). My favorite flavors were Caribbean Jerk and Asian Zing, and Parmesan Garlic was good too (especially on the soft pretzels we bought). I was surprised to find that the CJ and AZ flavors were not unbearably hot, despite being so far down on the spiciness meter. Medium, however, was a little much for me. It was fun to try lots of flavors of sauce and branch out a little. I'm normally a wuss with spicy food. But if I don't have to commit to one flavor, I'm much more likely to be adventurous, so this worked out really well.
Now I just have to convince my stomach that being adventurous is a good thing...
Movie Review: The Hunger Games
We had a double date tonight with Nathan's brother and his brother's girlfriend. First we went to Applebee's, then we saw The Hunger Games (finally). Best part was that it was free because we had gift cards to both places. Yay! (Also, I forgot how freaking expensive movies are in the evening...)
So, was the movie everything I hoped and dreamed? Was it everything you hoped and dreamed, because I'm pretty sure most everyone I know saw it a week ago or more?
Here are my impressions anyway. (It's late, so this isn't a magical essay or anything. More like stream of consciousness.)
It's a good movie. It's worth watching once. My sister in law would hate it (but then, she refuses to read the books too - not because they are bad but because she doesn't want to deal with the emotional drama it presents with children killing children). I agree with everyone who complained about the shaky cam at the beginning (pointless and really excessive, and did I mention pointless?). The movie did a good job at conveying violence without showing much, which I appreciated. I think Katniss is a better character in a first person book than in a movie, but I also think the actress did a really good job with what she was given. I imagined Cinna a lot more flamboyant (and he was, in the books, but I guess it's fine they changed that some). The most powerful scene in the entire movie for me was ***SPOILER*** when it cut to District 11 after Rue dies. (Not Rue's actual death. That was a bit long and almost melodramatic.) ***END SPOILER*** WOW. That had more punch than any movie scene I've seen in a long time.
So in short, I'm glad I saw it once, and I probably won't see it again (at least for quite a while). I'm not one for rewatching a lot of movies anyway, so don't take that personally, Hunger Games fans. It's still a great example of book to film gone well.
And now I have the final boss left in Dragon Quest V and that's it (except the post game bonus content) and I really ought to go to bed but I'm so close to finishing...
Tuesday, April 10, 2012
Draw Something Review
If you have an iPhone... and maybe even if you don't, you've probably heard about the latest craze since Words with Friends: Draw Something. (I never played Words with Friends. But I understand it's something like Scrabble + Facebook.) Draw Something takes the same concept, and blatantly rips off Pictionary instead of Scrabble. It's super simple: you get three choices of words (that are supposedly easy, medium, or hard), you pick one, and draw it. The person with whom you are playing can watch you draw it and guesses what it is. There is a pool of letters to choose from to make it a little easier. Then they draw something for you.
I was curious, so I gave it a try.
I will admit, it's very addicting at first, but the novelty wears off pretty quickly. I had about 10 games going the first few days, but after a week or so I really only have a few friends that take their turn on a daily basis. I personally decided I would only check it once or maybe twice in the evening - I don't get wi-fi on my iPod touch at work anyway, so that wasn't a very hard choice. It's fun, but there's not a lot of depth to it.
Still, there's a free version (with ads) and we got the paid version for $1 on sale. I think we got a dollar's worth of entertainment out of it. And some of the people who respond less often get very creative with how they depict the word. I appreciate the potential for creativity the game engenders. I do think it would be much, much easier on an iPad or with a stylus, but part of the challenge is drawing something with only your fingers and a limited color palate (you can unlock more colors the more you play, but you start with 4).
I understand why the developers included bombs (for when you get stuck), but so far they have only been annoying. The "use a bomb" button is right next to the letters to guess the word, so I have accidentally used a bomb when trying to pick a letter (or just accidentally brushing the screen) no less than THREE times, which I find a little ridiculous. I am probably in the minority here, but I find the placement of that button extremely obnoxious.
Anyway, it's a fun app for a while, and it's worth trying out the free version if you like Pictionary, but don't expect a lot of substance beyond that. It's a simple game, and a simple app.
Monday, April 9, 2012
Steampunk Goggles DONE!
Yes, that's right! After 3 sessions, we finally finished our steampunk goggles! That means it's picture time...


We discovered a few things as we made these. First, it takes me 2-3 tries before I do something right/like it. I pretty much started all the way over with the eye cups tonight (just the sewing part, not the sawing metal in half) because I decided I didn't like the way it looked 100%. Nobody else will probably notice. But it made me happy. (If only they sat straight on my face too...) Second, these things give you mad tunnel vision. I think I will mainly wear them on top of the head as a result. It wouldn't have been so bad if we could have cut the plumbing coupler halves down more, but that wasn't going to happen with our limited tools.
Anyway, we had lots of fun making them! I still have a few finishing touches to put on ours (mostly something to keep the strap from flapping up on the far side of the buckle) but they are completely functional!
In case you want to know where we drew our inspiration, we mostly pulled from Epbot's tutorial here.
Full album of pictures can be viewed here.

I couldn't resist. The bob-ombs were the perfect size. And then the mushroom and pokeball had to balance it out. And then the star just leaped in with Leafeon.

Look! The steampunk party decorations are still up!

I tried really, really hard to make mine straight. They were having none of it.

Headband goggles it is then.

This picture is awesome in so many ways.

Aviator Amy... has a nice ring to it.

Yep.
We discovered a few things as we made these. First, it takes me 2-3 tries before I do something right/like it. I pretty much started all the way over with the eye cups tonight (just the sewing part, not the sawing metal in half) because I decided I didn't like the way it looked 100%. Nobody else will probably notice. But it made me happy. (If only they sat straight on my face too...) Second, these things give you mad tunnel vision. I think I will mainly wear them on top of the head as a result. It wouldn't have been so bad if we could have cut the plumbing coupler halves down more, but that wasn't going to happen with our limited tools.
Anyway, we had lots of fun making them! I still have a few finishing touches to put on ours (mostly something to keep the strap from flapping up on the far side of the buckle) but they are completely functional!
In case you want to know where we drew our inspiration, we mostly pulled from Epbot's tutorial here.
Full album of pictures can be viewed here.
Sunday, April 8, 2012
Easter Sunday
Federal taxes are filed and done! Tax return should be en route later this week. I admittedly should have done them a long time ago, but I always put them off til April (even with they are super easy like they were this time).
Stay tuned for the exciting epic sequel, The State Tax Returns!
Anyway. Enough with questionable puns.
Today we got fed not one but two Easter dinners. I didn't eat much of the second one, but it was still pretty tasty. The Easter treats of yesterday's post were a big hit and instantly stopped all whining in our Primary class today (though that may have also been because treats = time to go home). I made some headway in Royal Envoy (excellent iPhone/PC game especially if you skip the "plot" cut scenes) and picked Dragon Quest V back up after a little hiatus due to the arrival of Professor Layton a few weeks ago.
Most importantly though, I enjoyed the opportunity to listen to the talks in church and remember the Savior's ultimate sacrifice and the joy of His resurrection. I hope you all enjoyed your Easter Sunday as well.
He is Risen!
Saturday, April 7, 2012
Easter Treats
My deepest apologies for not posting yesterday. I sat down to write something, and then I fell asleep on the couch. When I woke up, I was so disoriented and exhausted I barely made it to the bed. (I didn't even remember that I sat down to write a post...) Luckily, I slept about 11 hours and I feel much better. In fact, I did 5 loads of laundry today and exercised and made some Easter treats! How productive! (I also found a giant spider in my dirty laundry basket. I swear it hasn't been that long since I did laundry... I guess it's officially spring now that the spiders are back.)
Anyway. Easter treats. Remember the Easter package we got from my awesome in-laws? Yep. That's what we used.


I covered the bottoms of the Oreos on the first batch, but we didn't bother doing that on the second batch because the Oreos were just barely too fat to be covered and still stay inside the mold (I think that's because they were double stuffed).
This is an easy enough project that you can do it with your kids or by yourself for a quick festive treat.
I'm envisioning variations now... grasshopper cookies, or any homemade cookie if you baked them up small enough... or even a modification of these Oreo truffles might work too! Or you could press those square lattice pretzels in instead of a cookie... the possibilities are endless! What kind of hidden treat would you like best in these chocolate bites?
Anyway. Easter treats. Remember the Easter package we got from my awesome in-laws? Yep. That's what we used.

First, we filled the shapes in the bottom of the mold with one color. The easiest way to do this is plop a small spoonful of chocolate in the middle and spread it out with a toothpick.

Then we filled the rest with another color, put in an Oreo, and let it set up! Easy peasy!

Then we did some the other way around just because.

Finally, I made some chocolate drizzled pretzels with some of the leftover melted chocolate.
I covered the bottoms of the Oreos on the first batch, but we didn't bother doing that on the second batch because the Oreos were just barely too fat to be covered and still stay inside the mold (I think that's because they were double stuffed).
This is an easy enough project that you can do it with your kids or by yourself for a quick festive treat.
I'm envisioning variations now... grasshopper cookies, or any homemade cookie if you baked them up small enough... or even a modification of these Oreo truffles might work too! Or you could press those square lattice pretzels in instead of a cookie... the possibilities are endless! What kind of hidden treat would you like best in these chocolate bites?
Thursday, April 5, 2012
Baked Mac and Cheese
I am shocked to find that I have never posted my favorite mac and cheese recipe! Lucky for you, I made it tonight so it's fresh in my mind. Unluckily, I didn't take any pictures of it. :( Perhaps the leftovers will be photogenic tomorrow?
The recipe in question comes from here, brought to us by epicurious. I will reproduce it below with my added comments and modifications.
Baked Macaroni and Cheese
- 3/4 pound elbow macaroni (I use 3 cups)
For topping:
For cheese sauce:
The recipe in question comes from here, brought to us by epicurious. I will reproduce it below with my added comments and modifications.
Baked Macaroni and Cheese
Ingredients
- 3/4 pound elbow macaroni (I use 3 cups)
For topping:
- 2 tablespoons unsalted butter
- 1 cup panko (Japanese bread crumbs) or coarse dry bread
crumbs (It originally calls for 2, but that's way too much for my taste. Even 1 cup is pushing it. I normally use regular bread crumbs though; panko might be better.)
- 1 cup coarsely grated extra-sharp Cheddar (about 4 ounces) (I usually use a preshredded mix of cheeses from Costco; feel free to substitute your own favorite blend if you so prefer.)
For cheese sauce:
- 3 tablespoons unsalted butter
- 3 tablespoons all-purpose flour
- 1/2 teaspoon dried hot red pepper flakes (can be adjusted to your personal tastes - this amount gives a hint of a kick without being super noticeable)
- 2 3/4 cups whole milk
- 3/4 cups heavy cream (or you can reduce to 2 c. milk and use 1 can (12 oz) evaporated milk if you don't have cream)
- 4 cups coarsely grated extra-sharp Cheddar (about 1 pound)
- 2 teaspoons Dijon mustard
- 1 1/2 teaspoons salt
- 1/4 teaspoon freshly ground black pepper
Directions
1. Preheat oven to 400°F and butter a 3-quart shallow baking
dish. (I use a 9x13 Pyrex pan.)
Make topping:
2. Melt butter and in a bowl stir together with panko or
regular bread crumbs and Cheddar until combined well. Topping may be made 1 day
ahead and chilled, covered.
3. Fill a 6-quart kettle three fourths full with salted water and bring to a boil for macaroni.
Make sauce:
4. In a 5-quart heavy saucepan melt butter over moderately low
heat and stir in flour and red pepper flakes. Cook roux, stirring, 3 minutes
and whisk in milk.
5. Bring sauce to a boil, whisking constantly, and simmer,
whisking occasionally, 3 minutes.
6. Sometime in here, when the macaroni water begins to boil, dump in the macaroni. Cook as directed on the package. Be sure to stir occasionally.
7. Back to the sauce. Stir in cream, Cheddar, mustard, salt, and
pepper. Remove pan from heat and cover surface of sauce with wax paper if the macaroni is not yet ready.
8. Cook macaroni in boiling water until al dente. Reserve 1 cup
cooking water and drain macaroni in colander.
9. In a large bowl stir together
macaroni, reserved cooking water, and sauce. Transfer mixture to baking dish.
10. Sprinkle topping evenly over macaroni and bake in middle of
oven 20 to 25 minutes, or until golden and bubbling. Serves 6-8.
It does take a bit of doing to get the sauce and pasta done at the same time, but I have found the sauce to be pretty forgiving. Tonight I added in evaporated milk (instead of cream) right after the regular milk began boiling - no waiting 3 minutes, and everything else followed soon thereafter. (That's because the pasta I was using cooked in 7 minutes, and the sauce can take much longer if you let it.) As long as you give the cheese enough time to fully melt at the end, you'll be fine skimping a bit on the middle steps. It can be served as a main dish (if you're not in the mood for meat) or paired with chicken. I find it's well worth the effort to put it together, and it tastes good leftover too!
Do you have a favorite made-from-scratch mac and cheese recipe? I'd love to see it!
Wednesday, April 4, 2012
Easter Surprises
Things I accomplished today:
- went to work
- cleaned out the fridge (finally)
- took out (with much of Nathan's help) the massive pile of trash and recycling threatening to overtake the corner of my kitchen
- filled and ran the dishwasher
- did all the hand dishes (But not all the nasty tupperware from cleaning out the fridge. That will wait for the next dishwasher load.)
- made biscuits (again) (and they may have been dinner... again)
- went for a walk
- read outside
Sometimes I need little lists like that to remind me that I did, in fact, not fail today.
We also got a lovely Easter package in the mail today from my mother in law!

We will probably attempt to make the Easter treats later this week when I feel adventurous. I'm also interested to try making my own cookies that would fit in the mold, but we'll see how successful I am at that... or maybe I could do a caramel filling instead. Experimentation, here I come!
- went to work
- cleaned out the fridge (finally)
- took out (with much of Nathan's help) the massive pile of trash and recycling threatening to overtake the corner of my kitchen
- filled and ran the dishwasher
- did all the hand dishes (But not all the nasty tupperware from cleaning out the fridge. That will wait for the next dishwasher load.)
- made biscuits (again) (and they may have been dinner... again)
- went for a walk
- read outside
Sometimes I need little lists like that to remind me that I did, in fact, not fail today.
We also got a lovely Easter package in the mail today from my mother in law!

Oreos, yellow and chocolate candy melts, balloon animal kit, Cadbury eggs (plus two we ate already), and a mold to make Oreos+candy melts into Easter treats!
We will probably attempt to make the Easter treats later this week when I feel adventurous. I'm also interested to try making my own cookies that would fit in the mold, but we'll see how successful I am at that... or maybe I could do a caramel filling instead. Experimentation, here I come!
Tuesday, April 3, 2012
Life Lessons Learned from Bread
I apologize in advance for the shortness of this post. For whatever reason, I have a lurking headache and and my body is screaming for an early bedtime. Nevertheless, I wanted to share an amazing discovery I made before I succumb to the lure of the blankets.
Wait for it... wait for it...
Longer kneading = better bread!
I know, I know... everyone has taught me for years and years that you have to knead bread to develop the gluten. But I fell into the trap of thinking that if I used my Bosch mixer, that I could skimp on that step. It cleaned the inside of the bowl, so it's done. That sort of thing. I even used dough enhancer to feed my laziness. Well, a week or two ago I realized that maybe my laziness is why I get so many crumbs when I cut bread, and why I can never cut it very thin. Novel idea, right? (Sometimes I can be incredibly dense to these details if I don't want to notice them.) So I did an experiment and forced myself to let the Bosch beat my dough into submission for an extra 5 or 6 minutes.
It made a huge difference. I'm not kidding. I have effectively rediscovered the wheel of bread making. I don't even need dough enhancer anymore (which is good, since I'm nearly out). I just need a book on hand to read for a few extra minutes while I hold the Bosch and prevent it from walking off the counter as it beats that dough into submission.
So the moral of the story is: don't be lazy, and sometimes (in baking and in real life) a little extra effort makes a big difference inside, even if the outward appearance looks exactly the same.
Monday, April 2, 2012
Progress Report
I just want to say that progress on the steampunk goggles is coming along nicely... and they aren't quite done yet. But maybe next session we will finish them!

Today we put on the nose straps and made the straps that will go around the back of the head. (There are 6 - 2 for each pair, because we're using buckles. It will make sense in the end, I hope.)
Next up: attaching buckles to the straps, attaching the straps to the eye pieces, and cutting out the plastic overhead projector sheet to make "lenses". Then putting on the final touches and we should be done!
Sunday, April 1, 2012
Crochet Project: Psyduck
This weekend was General Conference, so I had 8 hours to burn on crocheting while I listened. Nathan requested I make him a Psyduck, and I conveniently had all the right colors. So off I went!


I'm pretty pleased with how he turned out. I used #10 crochet thread and a size 7 hook, with ecru, black, white, and yellow (not sure on the exact color name, unfortunately) for the colors. It took me almost exactly 8 hours to make him, which was very convenient. The pattern (linked above) was pretty easy to follow too. (I like her patterns a lot.)
Now on to the next project... we're working on our steampunk goggles some more tomorrow. Hooray!

He's about 3.5 inches tall.

I choose you, Psyduck!
I'm pretty pleased with how he turned out. I used #10 crochet thread and a size 7 hook, with ecru, black, white, and yellow (not sure on the exact color name, unfortunately) for the colors. It took me almost exactly 8 hours to make him, which was very convenient. The pattern (linked above) was pretty easy to follow too. (I like her patterns a lot.)
Now on to the next project... we're working on our steampunk goggles some more tomorrow. Hooray!
Subscribe to:
Posts (Atom)