Saturday, November 23, 2013

Stuff I have made recently, for your viewing pleasure

As some of you may be aware, I have been job hunting for the last month or so. Apparently job hunting makes me want to be crafty. So here's a compilation of pictures of what crafty things I have made while avoiding looking for jobs. Also, apparently this is a viable strategy for finding employment, because I now have a new job starting in about a week.

What is this, you may ask? 

It's a thing that goes under the door to block light and sort of block sound maybe a little bit.
I totally made up the pattern for that thing as I went along, but it is basically foam insulation for 1/2 inch pipes covered in fabric, and then the part that goes under the door is stuffed with fiber fil to make sure it goes all the way up to the bottom of the door because there's about a 1 inch gap. It's prettier and more convenient than the blanket we were using before, and now I can use the blanket as... well, a blanket instead.

On to the next one...

DOTA 2 Pillow!

Side view of the DOTA 2 pillow
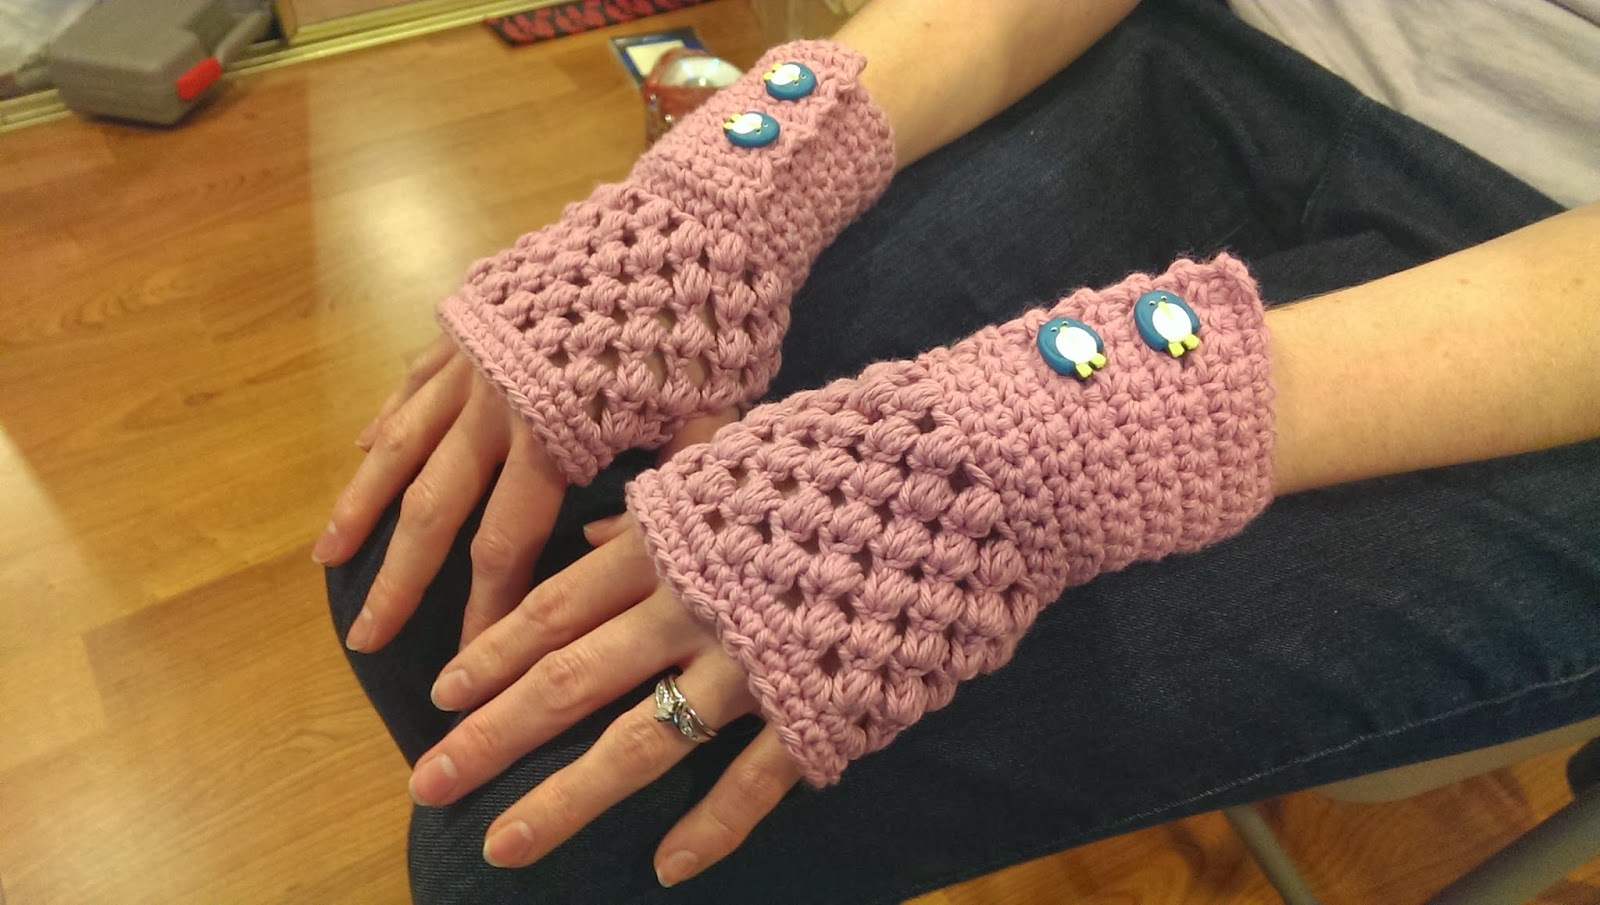
This one is entirely for my husband, who plays quite a bit of DOTA 2 to unwind after finishing all his school projects. It's just fleece for the fabric, cut into a square, sewn together, flipped, and stuffed with fiber fil. For those who have never played DOTA 2 (including me), this is the logo that shows up on Steam when you go to launch it. I made this pattern up too, sort of; I printed out the DOTA 2 logo and used it as a template.

Fingerless gloves
Since I get really cold hands when I sit at the computer all day, I made myself these fingerless gloves out of cotton yarn that I had no other plans for. Pattern here. Buttons are from Joann's.

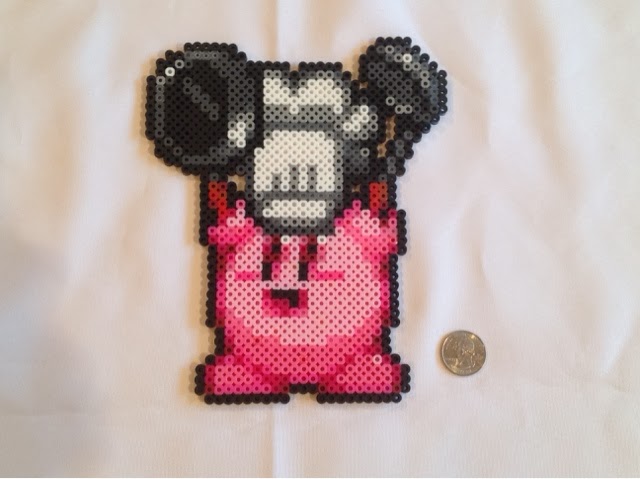
Atmos from Final Fantasy V in perlers
Ahh, back to perlers. This is a boss from Final Fantasy V, Atmos. I was very happy with how it looked in the end with our color choices, and it looks even better now that it's ironed.

IT Crowd perlers
And last but certainly not least, the IT Crowd characters. If you haven't watched The IT Crowd yet, it's a pretty funny show about people who work in IT. (I will issue a language/content warning though; it's not something I'd show to children.)

Not pictured are the 8 hand warmers (little fabric bags filled with rice that you can heat up for cold days) that I cut out the fabric for a year ago and never finished. I finally finished them. Even though it doesn't get that cold here. 

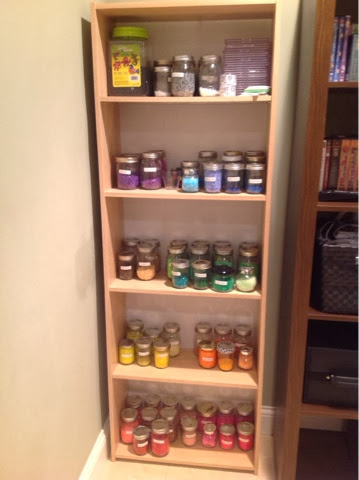
Also in progress: a crochet granny square rug that is nowhere near completion yet. I'll try to make some more headway on it soon. I have about 25% of the squares done so far. I work on them while I watch the Lizzie Bennet Diaries, which apparently everyone else has heard about before I did. At any rate, they make for decent entertainment while I crochet the same thing over and over again. Unfortunately, I am 75% of the way through this little snippet of entertainment, and not 75% done with the granny squares.

On the non-crafty side, I found a recipe for some really delicious peanut butter popcorn. Recipe copied below for your convenience. 

Spread 10 cups popcorn on a baking sheet. In a small saucepan over medium low heat, combine 1/2 cup honey and 1/3 cup sugar. Simmer, stirring frequently, until sugar dissolves. Remove from heat and stir in 1/2 cup peanut butter until melted, then mix in 1/2 teaspoon vanilla. Pour over popcorn and toss well to coat. Let cool before serving.

I also personally like to put salt on it too after pouring the goop over the popcorn. And as a side note, 10 cups of popcorn is about 1/3 c of unpopped popcorn kernels. 

And with that, I'm out.

Friday, November 15, 2013

A few of our more ambitious Perler projects in the last few months...

The Kirby post was only a taste of what we've been up to lately, but I can tell I'm not going to be good about regularly posting pictures of our past projects, so this is an overview of our most ambitious projects since May. (Well, some of them are less ambitious than others, but all are cool.)

3D Scene from Final Fantasy IV - Palom and Porom turn to stone to save the rest of the party. This one was a lot of fun to make but required some tricky modifications to change it from 2D to 3D. I'm pleased with how it turned out though.

Atma weapon from Final Fantasy VI - truly a beast to iron. Pun intended. Cart included for scale.

Majora's Mask (Zelda)

Our first canvas piece, from Super Mario World. I'm very happy with the finished product.

Who doesn't want a set of Tetris pieces on their wall to arrange in the perfect configuration?

And last but certainly not least, Luna from DOTA2. (fan sprite) We had to do some substantial color modification on this one to make it work, but I think it turned out really well.

Wednesday, October 30, 2013

Perler Beads: Kirby Extravaganza

It has come to my attention that the last perler blog post I did was back in May. Well... we've made a lot of stuff since then. And that might be a bit of an understatement. So rather than dump it all on here at once, I'm going to spread it out a bit into semi-themed posts.

So here's today's theme: Kirby!

Paint Kirby

Sword Kirby

Sleep Kirby

Ice Kirby

Singing Kirby

Cook Kirby
Some day we will make the rest of his many iterations, but these are the ones we have finished thus far.

Thursday, October 17, 2013

ChronoTrigger: Lucca Costume Bags

All right, we have the helmet, and we have the tunic. What's left? Oh yes. The bags. Lots of bags on Lucca's concept art.

First things first: scope out some thrift stores to make this not cost an arm and a leg. Or maybe your closet if you are well stocked with accessories.

A brown belt. Nothing flashy, just a normal brown belt, preferably at least an inch wide. You may already have one.
And a small brown purse. It doesn't have to look like this; just something small that can be easily modified to add belt loops to slide onto a belt.

Additionally, if you can find a super cheap beat up brown leather-ish bag that can be cannibalized, it's a great way to get cheap leathery type fabric that is just going to be used for small modifications, like so:

Adding belt loops to the back of a small brown purse

And another shot of the belt loops
 For these, I just salvaged some brown leather-type stuff from a purse from DI, cut it into small strips about 2 inches long and maybe an inch wide, hemmed the sides, and hand stitched the ends to the purse. (Something of a pain, to be honest, but it's not very many stitches. I just hate hand sewing because I'm awful at it.)

The only other modification I made to the bag was I took off the shoulder strap. That's it. Slide it onto the belt, and you're good to go. Perfect for stashing business cards, cell phone, cash, etc. while you are out and about showing off your lovely costume.

Next we have her larger blue bag. For this, scout out the remnants bin at Joann's for some light blue duck cloth. It's durable canvas-like cloth that comes in all sorts of colors and is perfect for making satchels out of. You'll also want to consider getting some pretty fabric to line it; your choice, really, since nobody sees it but you. Oh, and you'll need some light blue thread (or a contrasting color like brown if you want the top stitching to be visible).


The bag is basically one long rectangle for the body, so you only have the seams up the sides to actually sew. And then the top stitching if you are extra ambitious.

Basic pattern


To be honest, my sister in law figured out how to make these, so I can't really remember all the details. But I know we made it so that all the actual seams along the sides are inside the bag. It involved sewing each piece (outer part and lining) separately and inside out, and then sewing them together inside out, and then flipping it through a 2 inch hole before sewing up the hole. Then we top-stitched the front flap and edge showing in the upper left corner of the picture above.

front view of the strap
When you make your strap, make sure it is wide enough that if you sew it inside out, you can turn it right side in without a long struggle. I'm speaking from experience here. Make it as wide as you can to still have it work with your strap piece thingies.

view of the back of the strap

I used this same technique to make Chrono's bag too, just slightly modified as far as the straps go:


His slides onto his belt instead of being a shoulder bag.

So there you have it. Some not very detailed tutorials on making bags/satchels.

ChronoTrigger: Lucca Tunic Tutorial

I never got around to posting more tutorials on how I made my Lucca costume last Halloween, but I've always intended to. So tonight you get a little one. As a reminder, here's my first tutorial for the helmet. Please bear in mind that my sewing skills are pretty rudimentary, so this isn't going to get super technical or anything.

First, here's a picture of Lucca's concept art so you can see what I'm working off of:


To make Lucca's orange tunic, you'll need is 1-2 yards of orange fabric and some orange thread (plus normal sewing supplies, like pins, sewing machine, etc.). Some paper to make a pattern will help too. To determine exactly how much fabric you need, it will depend on a couple factors: first, if the fabric is 60 inches wide or only 45 (hopefully it's 60), and second, how wide around you need it to be. I am pretty sure 1 yard was more than enough for me, but I bought it a year ago so I can't really remember.

From there, it is pretty basic: you want to double up your fabric and trace out two pieces. One piece needs to be with the long edge along the fold (so that it's one big piece after you cut it out, for the back) and the other can be anywhere (for the two front panels). It will probably be easiest if you get some parchment paper or butcher paper (or something like that) and cut out the shape you want for the front panels first.

Front of Lucca's orange tunic
The two front panels are mirror images of each other. The exact shape doesn't matter so much, but you do want the curve on the outer seams to match pretty closely with the curve on your large piece for the back panel. I actually used the same template for the outer sides of the front and back so that they matched exactly. The back panel template will not be exactly the same though.

Back of Lucca's orange tunic

Make it a little longer than you think it might need to be so that you can play around with the length. It's easier to hem it shorter than to add more fabric! If you look closely, you can see I have about a 2 inch hem on mine.

Here's a very basic template to work off of if you need a more visual representation:


Once you have your pieces cut out, you'll want to pin the sides and top and try it on for size. See how big you want the arm holes, make sure it looks okay, etc. Then after you know where the arm holes will start, go ahead and sew up the side seams and top seams (along the top of the shoulders). Next you will want to hem the front edges (where it is diagonal on the front piece, the part that crosses over onto the other front piece) and the neckline along the back. Since it's curved, the easiest way to do this is to cut little notches in the fabric as needed to ease the curve so it doesn't scrunch all up, like so:

one zoomed in look at the neckline - see the notches along the curve?

Now hem the sleeves. (That's the trickiest bit.)

Sleeve after being hemmed - shoulder part is to the right, armpit part is to the left.
 The sleeves probably won't need notches to ease the fabric since they aren't very curved.

Lastly, try it on again and then pin it to the length you want before hemming the bottom.

Corner of the hem

As you can see here, if you get near the end and have extra fabric that is going to stick out funny over the edge, just tuck it under so you don't have to deal with it.

And there you have it! One Lucca tunic!


As an added bonus, you can use the leftover scraps to make a neck kerchief for Chrono!

And seriously, don't stress over this too much. If you have enough details, nobody is going to be looking closely at the construction. I'm sure someone with more sewing experience than me could whip up something super amazing, but this does the job and doesn't take too long to finish!

One last note; I used this same method to make Chrono's blue tunic as well. Here's a few close up pictures of that in case it is helpful.


Front of Chrono tunic (please excuse the wrinkles)

back of Chrono tunic

Monday, September 23, 2013

New House

So in case you missed the memo (and I apologize if you did, and you are offended; I didn't really broadcast it very loudly), we moved. To California. We're renting a house with my brother's family (3x the space for the same amount per month). It's 5 bedroom, 4 bath, which is plenty big enough for 6 people. We've been here just over a week, and we're pretty pleased with it so far. And to appease all the requests for pictures, I will put some up here.

We'll start with the upstairs, where we have occupied 2 of the 5 bedrooms.
Game Room (from the door). Please excuse the few boxes we have yet to unpack; they are the "random stuff" boxes.

Game Room (from the corner directly opposite of the door), complete with a basket of plushies

You'll have to imagine the picture of a master bedroom here, because it was too messy for my conscience to let me take a picture. It's very large though, and very pink. (We can thank the last tenants for that.) And we have our very own bathroom in our master suite, which is pretty awesome.

Next, we'll go downstairs to the common areas.

From the front door looking up the stairs

Living room (taken from next to the piano (see last picture for reference))

Kitchen (carefully censored to not see most of the food on the rest of the counter space)
Please note or kitchen is painfully clean of any crumbs or dirty dishes. This is not because I'm a great housekeeper. It's because Irvine is experiencing a massive ant infestation this year, and any dirty dish that's left out for more than an hour is covered in swarms of sugar ants. It's very good incentive to keep up with the dishes and mess, so I guess it's a blessing in disguise? (Though I don't particularly appreciate them swarming over my bathroom floor, especially since there's no food there anyway.)

Now to the left of the kitchen is a dining area where our kitchen table goes, and next to that is...

The family room (aka perler and Rock Band room)

A close up of my carefully organized perler bead jars

And that concludes the tour! It really is a nice house, ants aside. We have a backyard with a patio and grass, and the location is excellent - pretty much within 15 minutes of anything we could want. 

As far as everything else, we're settling in pretty well. Nathan bikes to school to save on gas and get some exercise, and I'm working from home until the end of October (by which point I hope to find a new job). We toured Google's Irvine campus on Sunday, which was pretty sweet, and we tried out the Veggie Grill on Saturday (Nathan won free entrees there at New Student Orientation). So now I know what chickin' tastes like (soy, wheat, and pea proteins made up into mock chicken), and it's actually pretty decent. 

Hopefully I will get back to posting perler pictures soon! We've made a few new things, despite the frenzy of packing and unpacking, so stay tuned!

Thursday, August 1, 2013

Polymer Clay Earrings

I got polymer clay for Christmas, fully intending to experiment with it right away. Well, you know how time gets away from one... but I finally got to it a few weeks ago with my cousin in law Charisse. After a few mishaps trying to work with clay that was excessively old, hard, and overly crumbly, we discovered that the other box of color samples I had was much softer and more workable. Everything went much more smoothly after that.

The basic principle of working with polymer clay is you work it in your hands until it is soft and pliable, mixing together two colors if desired to lighten or darken the clay. Then you shape it how you want it to look (we have some wax working tools to do details) and bake it in a toaster oven. With Sculpey III clay, the directions say to bake 15 minutes for every quarter inch thick the sculpture is.

I must say, it was very tricky to get details as exact as I wanted, but eventually I was satisfied. And overall it was pretty fun, once we figured out that the clay wasn't supposed to crumble to bits when you kneaded it.

Here's what I ended up making:
Top row: Pikachu tails, wizard hats, piranha plants; bottom row: books, icicle things, and Kirbys.

The piranha plants look like they are biting my ears when I wear them. :P

And here's what Charisse made:

Yoda, blue flowers, orange flowers, daisies, and R2D2

I was quite impressed with the detail she got with Yoda and R2D2, and the daisies are adorable too.

Any suggestions what I should make next?